Losing your writing because of a sudden crash or accidental click is incredibly frustrating. You spend hours typing, editing, and formatting, only to watch it vanish from your screen in an instant. Maybe your laptop battery died, or perhaps Windows pushed an unexpected update that forced your machine to restart. Regardless of the reason, the panic sets in fast. You need to recover unsaved word data right now. The good news is that Microsoft 365 and modern operating systems are much smarter than they used to be.
They create hidden backups and temporary caches specifically designed to rescue your work. This guide walks you through the exact steps you must take to get your document back. Grab a coffee, take a deep breath, and let us dig into your hard drive.
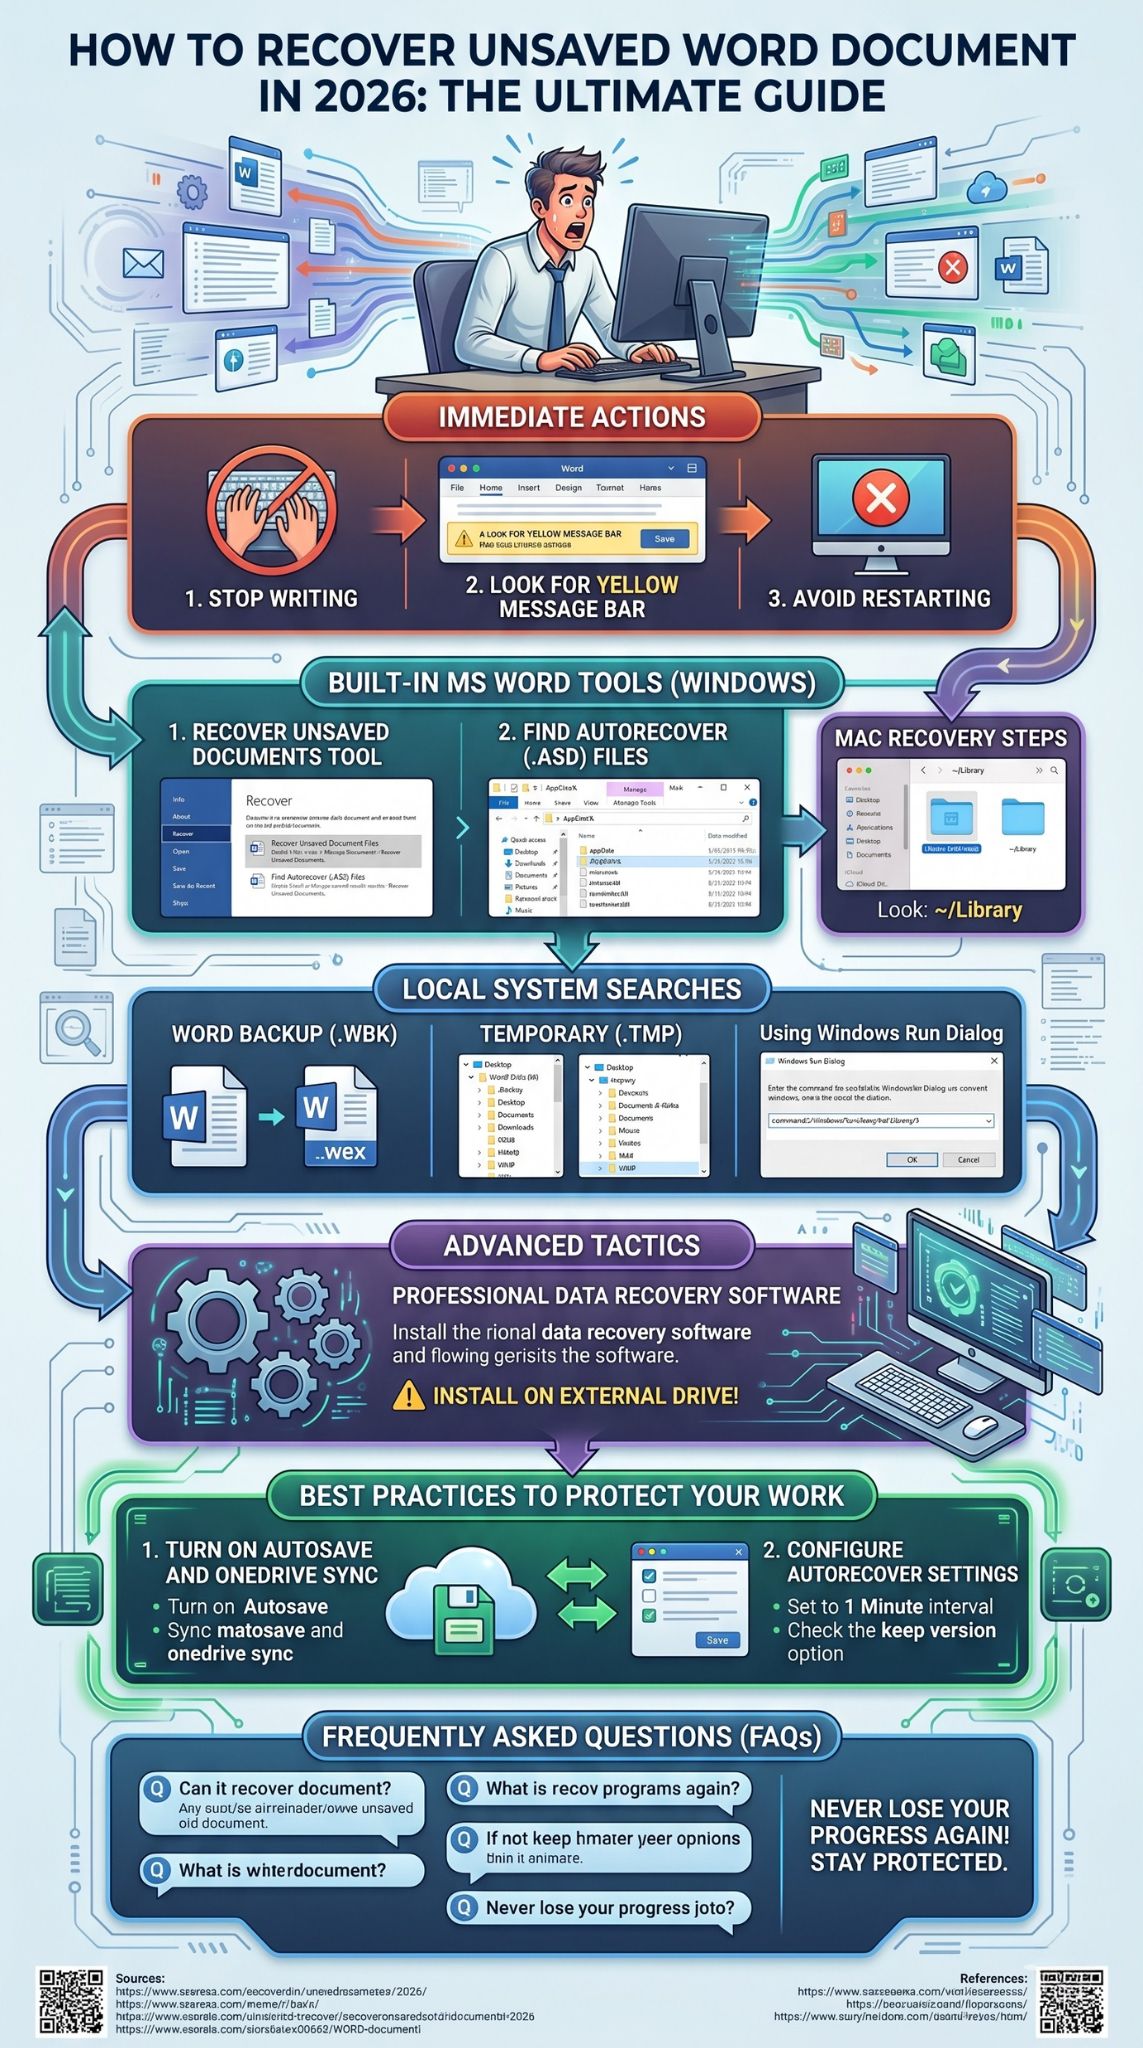
Immediate Actions When You Lose Your File
The moment you realize your document is missing, your first few clicks determine whether you get it back. Your computer treats deleted or missing files as available storage space. If you start downloading software or moving large video files around, you might overwrite the exact text you want to save. Taking the right immediate actions prevents permanent data loss and sets up the ideal environment for the recovery steps that follow.
|
Action Step |
Reason for Action |
Priority Level |
|
Stop typing immediately |
Prevents overwriting temporary data |
High |
|
Keep Word open if it froze |
Allows built-in diagnostics to run |
High |
|
Look for message bars |
Microsoft often hands the file back to you |
Medium |
|
Avoid restarting computer |
Restarting clears your system temp folder |
High |
Stop Writing to the Hard Drive
Your hard drive is constantly reading and writing data in the background. When a Microsoft Word document closes without saving, the actual text data usually remains hidden deep within your system cache. However, the operating system flags that specific space on the drive as empty. If you open a web browser, stream a video, or install recovery software right away, the computer fills that empty space with new information. This permanently destroys the hidden document. Stop all unnecessary activities. Close other applications gently, do not run antivirus scans, and focus solely on the native recovery methods first.
Look for the Yellow Message Bar
Sometimes, Microsoft hands you a lifeline without requiring any technical work. If Word crashes abruptly, the software recognizes the error during the next launch. Open a blank Microsoft Word file. Look at the very top of your screen, just below the ribbon menu. You might see a bright yellow horizontal bar that says ~Recovered Unsaved File~ or something similar. If this bar appears, click the button inside it immediately. Word will open the last known snapshot of your text. From there, you must manually save it to a secure location on your desktop or cloud drive. Do not ignore this bar, as it might disappear if you close the application again.
Built-In Features to Recover Unsaved Word Documents
Microsoft includes several hidden safety nets designed specifically to recover unsaved word files for users who forget to hit save. These tools live deep within the file menu and background directories. Knowing where to look is half the battle. These built-in features work perfectly for about eighty percent of lost file situations in 2026.
|
Recovery Method |
Success Rate |
Ease of Use |
Target File Type |
|
Recover Unsaved Documents Tool |
Very High |
Beginner |
Native Word Drafts |
|
AutoRecover (.asd) Search |
High |
Intermediate |
.asd backup files |
|
Word Backup (.wbk) Files |
Medium |
Beginner |
.wbk saved backups |
|
Temporary (.tmp) Search |
Low |
Advanced |
.tmp system files |
Method 1: The Recover Unsaved Documents Tool
This method remains the quickest and easiest way to find your lost text. Microsoft maintains a dedicated folder where it automatically dumps files that are closed abruptly. To access this folder, open a completely blank document. Click on the File tab located in the top left corner. Scroll down the left sidebar and click on Info. You will see a large square button labeled Manage Document. Click it, and select the option to Recover Unsaved Documents from the drop-down menu. A file explorer window opens, displaying everything in your hidden drafts folder. The names might look like strange letters and numbers, but you can identify your work by checking the date and time modified.
Read Also: How to Speed Up Slow Mac in 2026: Complete Guide
Method 2: Find AutoRecover (.asd) Files
If the native tool comes up empty, you must manually hunt down the AutoRecover files. Microsoft Word generates these .asd files continuously while you type. Press the Windows key and the R key simultaneously to launch the Run dialog box. Type %AppData%\Microsoft\Word\ and press enter. This shortcut takes you directly to the hidden Word data directory. Look through the folders here for anything ending with the .asd extension. If you spot one, you cannot just double-click it. You must open Word, click File, click Open, choose Browse, and navigate to that exact folder. Make sure you change the file type filter at the bottom right of the window to All Files, otherwise the .asd file remains invisible.
Method 3: Search for Word Backup (.wbk) Files
Word has an optional setting that forces it to save a backup copy every time you save a regular document. These files carry the .wbk extension. If you ever turned this feature on, your recovery process is practically finished. Open the folder where you originally kept the document. Look for a file named ~Backup of~ followed by your normal file name. If it is there, open it in Word. If you cannot remember the original folder, open your main File Explorer window, click on This PC, and type *.wbk into the top right search bar. Let the system scan your entire hard drive. It might take a few minutes, but it will surface any existing backup copies.
Method 4: Locate Temporary (.tmp) Files
When standard Word extensions fail, checking your system temporary files serves as a solid backup plan. Your computer creates temporary files constantly to manage active applications. Sometimes, fragments or entire copies of your document end up here. Press the Windows key and R to open the Run box again. Type %temp% and hit enter. This opens the main system trash and cache directory. Search this folder for *.tmp and sort the list by the date modified. Look for files created at the exact time your computer crashed. Copy a likely file to your desktop, right-click it, select rename, and change the .tmp ending to .docx. Try opening this renamed file in Word. It is a messy process, but it works when other methods fail.
Recovering Files on Different Operating Systems
Your operating system dictates exactly how and where files are stored behind the scenes. Windows 11 manages cache data very differently than macOS. Understanding the specific pathways for your hardware helps you recover unsaved word files much faster.
|
Operating System |
Default Hidden Path |
Built-In OS Tool |
|
Windows 11 / 10 |
AppData\Roaming\Microsoft |
File History / Recycle Bin |
|
macOS Sonoma / Ventura |
Library/Containers/com.microsoft.Word |
Time Machine |
Windows 11 and Windows 10 Recovery
Windows hides most of its crucial recovery folders to prevent users from accidentally deleting system files. Before you can find your document, you must make these folders visible. Open File Explorer, click the View tab at the top, select Show, and check the box for Hidden items. Now, navigate to your main C drive. Go to Users, click your specific username, open AppData, go to Local, open Microsoft, then Office, and finally look inside UnsavedFiles. You should also check the Roaming folder path under AppData to ensure you cover all bases. If you find your document, move it to the desktop before attempting to open it.
Mac Recovery Steps
Mac users face a completely different folder structure. Word for Mac heavily utilizes an isolated AutoRecovery folder. To find it, open the Finder application. Click on Go in the top menu bar and select Go to Folder. You need to type a very specific command path: ~/Library/Containers/com.microsoft.Word/Data/Library/Preferences/AutoRecovery and then press return. This action bypasses the normal interface and drops you right into the hidden backup directory. Look for files starting with ~AutoRecovery save of~. If you locate your text, drag it to your desktop. Mac users should also instantly check their Time Machine backups, as a recent hourly snapshot might contain the missing folder state.
Advanced File Recovery Tactics
If the built-in Microsoft tools and standard operating system searches yield zero results, the file might be detached from the normal software pathways. This requires digging into deeper system mechanics to scrape the raw data off your hard drive.
|
Tactic |
Technical Skill Required |
Risk Level |
|
Command Prompt / Run Searches |
Intermediate |
Low |
|
Professional Data Software |
Advanced |
Medium |
Using the Windows Run Dialog
Sometimes the newest versions of Windows store emergency backups in obscure locations that standard searches miss. Open your Run dialog box and paste this exact directory string: C:\Users%username%\AppData\Local\Microsoft\Word\TemporaryBackupFile and hit enter. Microsoft 365 sometimes utilizes this specific folder for emergency cache dumping during fatal system errors. If the folder opens and you see files inside, sort them by time. Any file matching your crash time is a candidate. Always copy these files to a separate folder before trying to open them, as interacting with them directly in the cache folder can cause them to corrupt instantly.
Professional Data Recovery Software
When every local search comes up empty, your last resort involves using third-party data recovery software. These programs ignore the standard file pathways and instead scan the physical sectors of your hard drive for raw text signatures. If you decide to use software, you must follow one critical rule. Install the recovery program on a completely different drive, like a USB flash stick or an external hard drive. If you install the software onto your main C drive, the installation files might overwrite the exact document you are trying to save. Run a deep scan, filter the results strictly for .docx extensions, and review the previews before extracting the data.
Best Practices to Protect Your Word Documents
The stress of losing a document teaches a harsh lesson about digital hygiene. Relying on emergency recovery methods is stressful and unreliable. By changing a few simple settings right now, you guarantee that you will never have to hunt for a missing file again.
|
Protection Strategy |
What It Does |
Recommended Setting |
|
AutoSave with OneDrive |
Saves every keystroke instantly |
Toggled ON |
|
Version History |
Keeps past copies for rollback |
Handled by AutoSave |
|
AutoRecover Intervals |
Saves local backups frequently |
Every 1 minute |
Turn on AutoSave and OneDrive Sync
The absolute safest way to work in 2026 is by leveraging cloud synchronization. Microsoft provides an AutoSave toggle switch located in the top left corner of your Word window. When you flip this switch, Word demands that you save the file to your OneDrive account. Once connected, Word saves your document in real-time. Every single word you type syncs to the cloud instantly. If your computer literally catches fire, your document remains perfectly intact online. This feature also unlocks Version History. You can click the title of your document at the top of the screen, select Version History, and instantly revert to a version from ten minutes ago if you accidentally delete a huge paragraph.
Configure AutoRecover Settings
If you strictly refuse to use cloud storage and prefer saving locally, you must tighten your local backup intervals. Open a document, click File, and select Options at the very bottom of the sidebar. In the settings window, click on Save on the left panel. Find the checkbox that says ~Save AutoRecover information every X minutes~. The default is usually ten minutes, which is far too long. Change that number to one minute. This simple tweak means the maximum amount of work you can ever lose is sixty seconds of typing. Make sure the box directly below it, regarding keeping the last version if you close without saving, remains checked.
Final Thoughts
Losing track of your important writing feels terrible, but modern software gives you multiple ways to fight back. Knowing how to recover unsaved word data requires patience and a bit of folder digging, but the files are almost always sitting there waiting for you. Start with the simplest methods like the Manage Document tool, and work your way down to the hidden temporary folders. Once you get your text back, do yourself a favor and turn on AutoSave. Your future self will appreciate the peace of mind.
Frequently Asked Questions (FAQs)
Users experience a wide variety of strange bugs when dealing with missing documents. Below are some of the most uncommon but highly specific questions people ask when trying to recover their work.
|
Common Issue |
Quick Answer |
Related Feature |
|
Clicked Do Not Save |
Check UnsavedFiles folder |
Manage Document |
|
Empty Recycle Bin |
Use third-party scanner |
Disk Sectors |
|
Corrupted text on open |
Use Open and Repair |
File Menu |
How do I fix a document that opens but contains random symbols?
If you recover a file but it looks like gibberish or random wingding symbols, the file is corrupted. Open Word, go to File, click Open, and select Browse. Click on your corrupted file once to highlight it. Instead of clicking the Open button normally, click the small arrow next to the Open button and select ~Open and Repair~ from the list.
Can I recover a Word document if my computer forced a restart during an update?
Yes, forced updates usually trigger the emergency cache protocols. First, check the yellow message bar when you reopen Word. If it is not there, immediately navigate to the AppData Roaming folder and search for the .asd files. Windows tries to dump the RAM contents into an .asd file right before the forced reboot occurs.
Does signing out of my Microsoft account delete my unsaved local drafts?
No, signing out of your Microsoft 365 account only pauses cloud syncing. Your local hidden folders, such as the UnsavedFiles directory in your AppData folder, remain untouched on your hard drive. You can still access them using the manual file explorer paths detailed above.
What happens to temporary files if I run a PC cleaner program?
PC cleaner programs like CCleaner or native disk cleanup tools will almost certainly delete your unsaved temporary files. These programs target the exact AppData and %temp% folders where Word hides its emergency backups. Never run a cleaning program if you are currently missing a document.